15 Minute Stir Fry: Low carb, healthy, fast and husband/kid approved

As a mom I’m always on the lookout for quick, easy, healthy food that my family will eat. My husband and I work full time so getting dinner on the table after work is a daily struggle. This recipe is Perfect for the “Oh Shit” night when you realize you didn’t plan anything, but your family will still need to be fed. Here are the basic ingredients, but one of the best things about this recipe is you can add almost any leftovers you have in the fridge.

Tonight I happened to have a leftover large chicken breast my husband grilled on Friday.

All you really need on hand is 2 bags of frozen riced Cauliflower, with or without added veggies, the kind I got had peas and carrots in it, a couple of eggs, garlic and soy sauce. I also added ginger and rice vinegar, but I think it would be fine if you didn’t have those.

Heat up a large pan to medium high heat, I went to 8 out of 10 on my dial, add oil. I used coconut oil because it does not smoke until it is really hot. Once the oil is hot add both bags of frozen riced Cauliflower, still frozen directly to the pan. Add any other leftover veggies you have in the fridge that need to be used up, I had half a bag of peas and carrots. Add garlic and ginger if you have it. Season with salt and pepper. Let it cook for about 5 minutes. Turn the heat down to medium low and make an empty spot in the middle of the pan, add oil. Add 1 egg per person, beaten lightly, I added 3 eggs here and it was about the right proportion. Scramble eggs by stirring constantly so they don’t stick. Mix everything together, add precooked chicken or other meat, a few tablespoons of soy sauce and rice vinegar if you have it. Let it cook on low for 5 minutes and serve!

The texture is not exactly the same as rice, but my husband who is a rice lover liked it and the 3 year old had three servings! I call that a win!

Other things that would be great in this dish: onion, bell peppers, bok choy, zucchini, squash, broccoli, asparagus. Any leftover meat such as steak, pork loin, bacon, ham, turkey.
An Act of Service: Chicken Enchiladas (Freezer Meal)

The radio show I listen to every morning recently had a segment about the Love Languages. I had heard about them before and am vaguely aware of them, but something clicked when they talked about “Acts of Service.” I realized that cooking food is one of the big ways that I show my family I love them. I do enjoy cooking quite a bit, but the weekly grind of having to get something on the table every night is driven much more by my desire to serve my family than it is a love for cooking. So the question becomes how do I balance a full time working mom schedule, early bedtime for the 2 year old and providing a home cooked meal at least 4 nights a week?

Enter Freezer Meals. I have tried the freezer meals prepped in a bag that you thaw and drop in the crock pot in the morning, but I wasn’t really satisfied with the quality of the finished meal. Yes it was edible, yes it was much less expensive than take out, but it didn’t taste like it was made with much love. So I started writing down meals I thought would do well to make in a batch and freeze to pull out on a busy weekday.

The first of these is Chicken Enchiladas:

Chicken Enchiladas (Freezer Meal)

3-5 Baked Chicken Breasts (or the meat from 1 large rotisserie chicken): If baking boneless skinless chicken breasts I drizzle olive oil, garlic powder, paprika and ancho chili powder, salt and pepper on them and bake at 350º for 30-45 minutes or until they read 165º in the thickest part. Not over cooking the chicken will help keep it nice and moist.

1 large onion, I use sweet yellow sliced

2 medium bell peppers, I use one yellow and one red sliced thin

1-2 Tablespoons Taco Seasoning, I use Penzey’s Original Taco Blend

16 soft taco size tortillas, approximately

1 large can enchilada sauce

Shredded Cheese, I have used the bag kind or block cheese that needed to be used up, I recommend cheddar, Monterey jack, or other melty cheeses

Optional: Green Onions, Chives, Cilantro

Directions:

Saute the sliced onions and peppers until soft with a little browning, add taco seasoning.

Slice or shred the chicken and add to pan with onions, peppers and spices.

Get out several 8×11, 9×13 or whatever size oven safe casserole dishes you have. I use the glass ones with plastic lids, like this one.

One tortilla at a time add the filling, wrap up the tortilla and place in the casserole dish. My dishes held 4 filled tortillas each. Once they are all filled, pour enchilada sauce over them all, top with shredded cheese. You can now freeze them all or leave one refrigerated to have tonight or one day this week. To bake, take casserole out in the morning and put in the refrigerator, when you get home take it out and put it on the counter while the oven preheats to 350º, bake for 35-45 minutes or until the middle is hot. Top with optional fresh garnishes: green onions, chives or cilantro. Serve with a side of salsa and sour cream. Enjoy a stress free home cooked dinner with almost no kitchen time on a weeknight!


Crock Pot Beef Vegetable Soup

Our trip to the pumpkin patch, via train ride, this weekend has me feeling like fall has arrived. Pumpkins on the front porch and leaves in the yard, it must be time to bring out the crock pot and cook up some warm and cozy meals. Never mind that it was 87 degrees today, we are eating fall food!

This morning I got up a few minutes early, cut up a chuck roast and threw it in the crock pot. I added one medium sized bag of mixed vegetables, one large can of diced tomatoes,  refill this can with water and add it, and a regular can of pinto beans (drained). Season it with a couple of tablespoons of Worcestershire sauce, a few dashes each of onion and garlic powder, 1/2 tablespoon of instant chicken or beef bouillon, I had chicken, and black pepper.

Set the Crock Pot to low and let it cook 8-10 hours. I turned it on about 7 and we turned it off and let it start to cool down around 5.

Top with any cheese you have on hand, this is a Wisconsin version of Manchego.


Crock Pot Beef Vegetable Bean Soup

1 3lb Chuck Roast cut in to 1 inch cubes

1 large can diced tomatoes, plus one can water

1 regular can pinto beans drained

1 medium bag mixed vegetables, the one I used had green beans, corn, peas, carrots

2 Tablespoons Worcestershire sauce

1 Tablespoon powdered chicken bouillon

Freshly ground black pepper to taste

1 teaspoon each garlic and onion powder

Add everything to the crock pot and set on low for 8-10 hours.

Serve with cheese on top.


Roasted Farm Basket Pepper Salsa

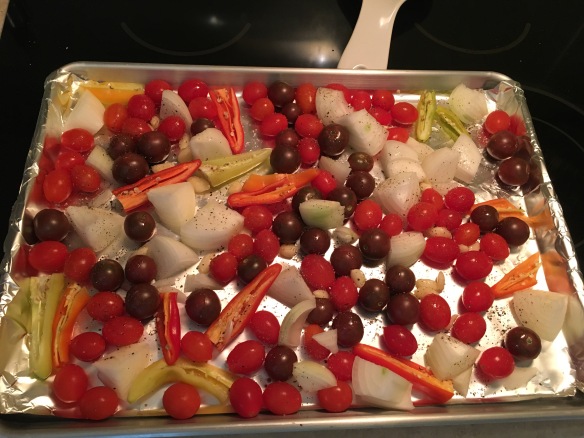
About every other week we get a farm basket delivered to our house from a local farm with goodies like seasonal veggies, jam, bread and eggs. The past two weeks included peppers, onions and cherry tomatoes in our basket from Hornsby Farms. We used them in salad and tacos, but had an abundance left. So I spread them out on a baking sheet, added some garlic cloves, sprinkled them with salt, pepper and a little bit of olive oil and popped them in the oven at 400 degrees for about 30-40 minutes while I was cooking dinner.This is what it looked like after roasting. The tomatoes were blackened and most had popped open. The peppers and onions were soft and brown around the edges. I let the whole pan cool while we ate dinner and afterward I put the juice of one lime and a handful of cilantro in the food processor, then piled the roasted veggies on top. Gave it about a minute on chop and here is the result! It is smokey, spicy and tastes a little like a romesco sauce because of the large amount of mixed peppers, delicious.

First Fall Soup

The first time I made this soup I used a recipe from a Cooking Light magazine, if I am remembering correctly. It was titled something like Chicken Tortellini Soup, but I can’t seem to find the original recipe. I have made it so many times that I haven’t used the recipe in at least 5 years. It has evolved slightly over time to include using smoked chicken instead of baked, using homemade stock from the smoked chicken carcass and varying the ingredients whenever I need to use something up or want a change in flavor.

In honor of the first day of Fall this week, I made our first batch of soup in months. Soup just isn’t appealing when it is 95-100 degrees outside. It is still pretty hot and dry, but in the mornings you can feel a crispness in the air that makes me wish for cool days and hot soup. This batch of soup was a little bit different than the original recipe. Below is the basic recipe and the alterations I made for this batch.

Chicken Tortellini Soup

1 whole chicken – can be rotisserie, baked, or in this case smoked

2 quarts chicken stock – if using store bought go for low sodium, I used homemade from the carcass of the whole chicken, just put it in the crockpot covered with water overnight on low.

Start with a large soup pot, put a couple of tablespoons of olive oil in the bottom, bring to medium high heat.

Add 1 Onion sliced or diced depending on your preference for rustic soup or smooth

Add 2-3 peeled diced carrots to the pot along with the onion, let them get soft and a little brown.

Add 1 stalk celery diced, I did not do this because I didn’t have any celery. I added 1 bunch of Kale after adding the liquid instead, a lovely substitute.

Add 2 cloves garlic let it start smelling good. Salt and Pepper the veggies as they saute.

Pour 2 tablespoons of balsamic vinegar into the bottom of the pot, stirring to coat all the veggies. This is another alteration that I picked up from a beef stew recipe. It gives an added dimension of flavor and depth without tasting vinegary.

Add 2 quarts of chicken stock and 1 quart of water. Bring to a boil.

Once boiling add the Kale, Chicken meat, 1 12 inch link of smoke sausage cut into 1/2″ rounds. Bring back to a low boil.

This is the point to add seasoning. Thyme is a traditional spice that was called for in the original recipe. I have found that Tony C’s cajun blend is fantastic in this soup. For this batch I added a few shakes of Sausage seasoning mix from Penzey’s, 2 tablespoons of worchestershire sauce, Salt and Pepper, and a few dashes of Cayenne pepper. A little bit of heat in the form of cayenne or red pepper flakes really kicks up the flavor without being Spicy. Once it is boiling again, add 1 package frozen cheese tortellini. You can use refrigerated if you want to, but I find that the frozen tends to have a better texture and hold it’s shape when re-heated much better. We ate on this soup for a couple of lunches and one easy dinner. The rest I froze for a quick easy dinner in a couple of weeks.


Looking back…The Great Flood

I have put off writing this post because of a fear of failure. The Grand plans of January sitting in my chair browsing catalogues, writing lists, reading up on best practices for gardening, everything is optimistic and full of hope. My spring garden produced a modest harvest of small red and gold potatoes, about 2-4 per plant. The onions produced enough pearl sized onions for a giant pot of beef stew. Starting in June we had incredibly hot and dry weather, going weeks at a time with no rain. The watermelon, green beans and cucumbers were crispy fried by mid June, no amount of watering would save them. This summer’s garden was almost a complete failure apart from some tomatoes and a few peppers. As the hot and humid, but very dry summer comes to an end I am thinking fondly of the rainy days of winter we had this year. 


We had an unusually warm December, the days leading up to Christmas had highs in the 70’s. A few days before Christmas it began to rain steadily and on Christmas eve the bottom opened up, flooding an already saturated ground with more water than it could hold. We had 4+ inches of standing water in our carport, but were very fortunate that none of it got in the house.River running through the backyard.White caps in the front yard.

We had 10+ inches of rain in about 36 hours and pushed the limits of our new house’s drainage and landscaping. The monthly total was 11.5″ of precipitation. We sure could use a little bit of rain around here now. 

I accidentally left the sprinkler on in the garden yesterday morning, for almost 10 hours, whoops. Thought for sure I would have a flooded yard when I went to check it, but nope the ground soaked up every bit of it! Fall garden update coming next week. 

What I Planted – After Frost Date (Sort of) April 3rd

With the garden prepped and ready, pre-frost plants in the ground I was itching to get the rest of it planted. Our official safe planting date after frost is April 15th. All the local farmers I talked to agreed that the unofficial old wives tale is don’t plant until Easter. This year Easter fell on March 27th, more than 2 weeks before the safe date. I didn’t manage to get any plants in the ground on Easter weekend, but a week later R and I packed up and made a trip to our local garden store.

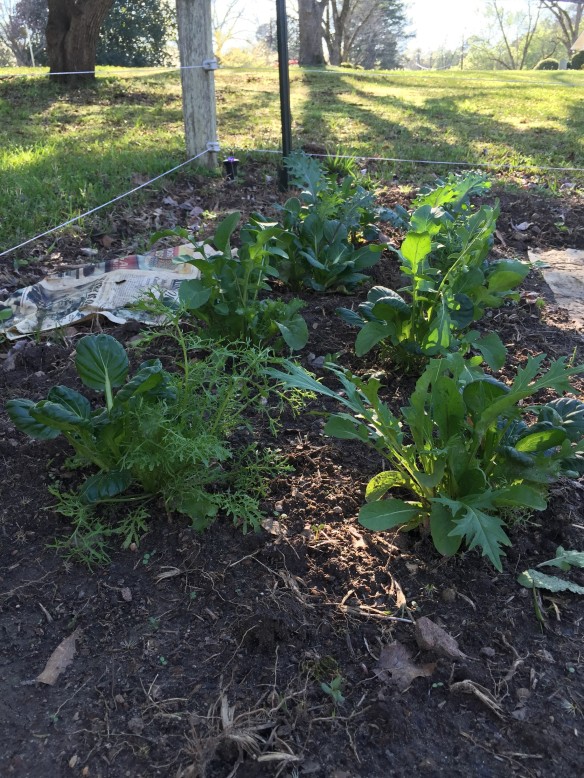
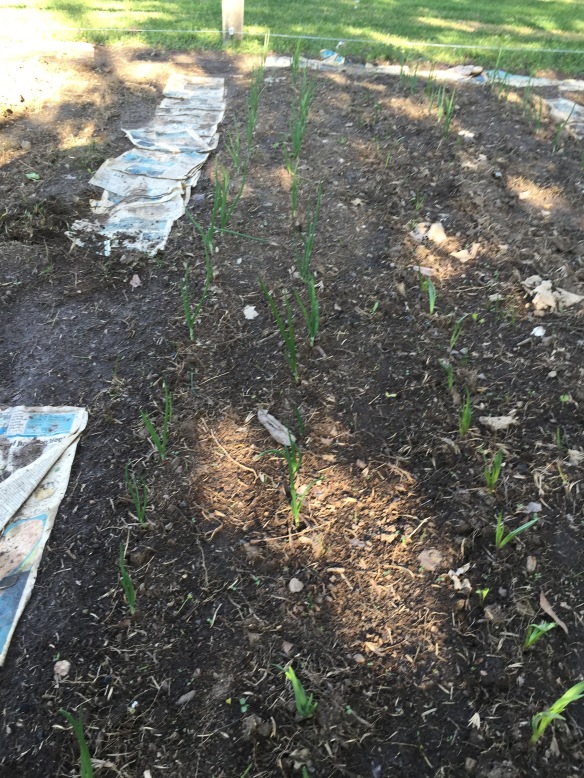
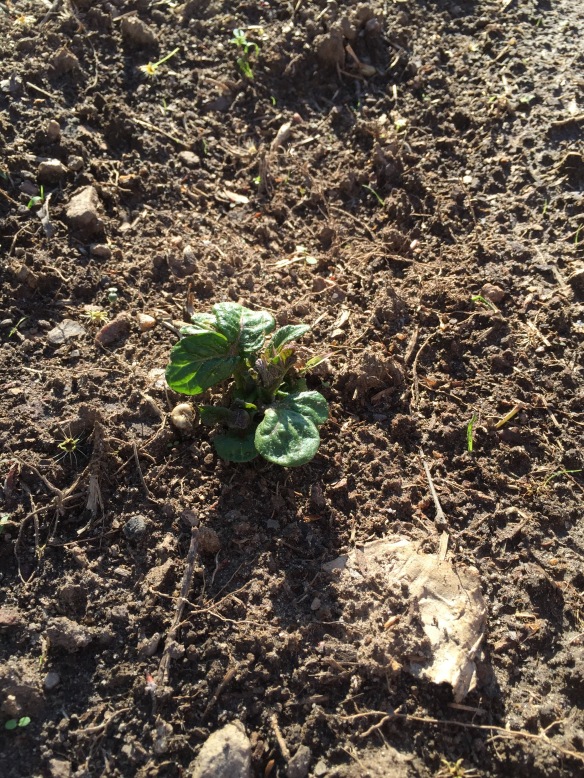
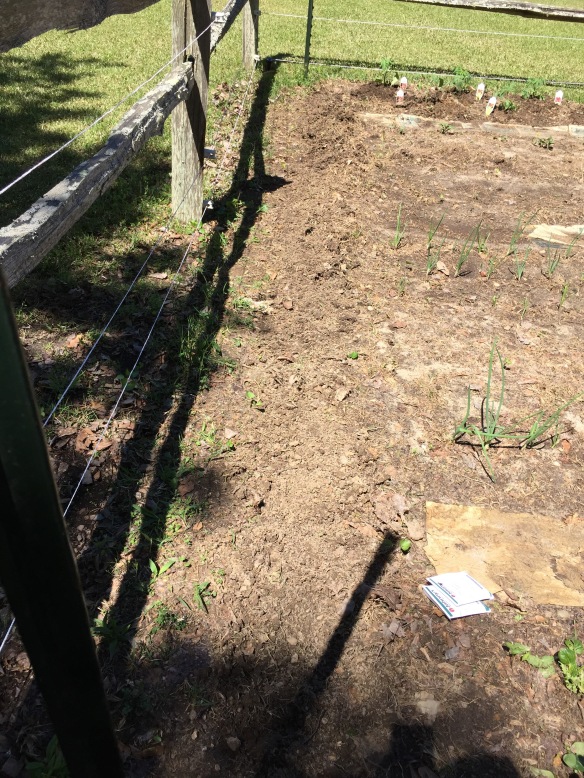
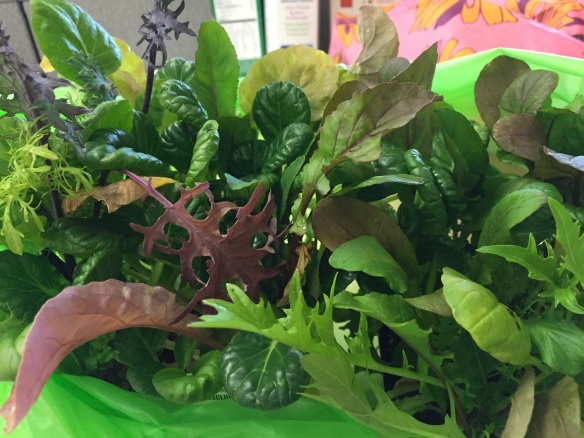
Below is an updated look at what I planted about 3 weeks before, the only thing that is not up yet is the shallots:

Lettuce

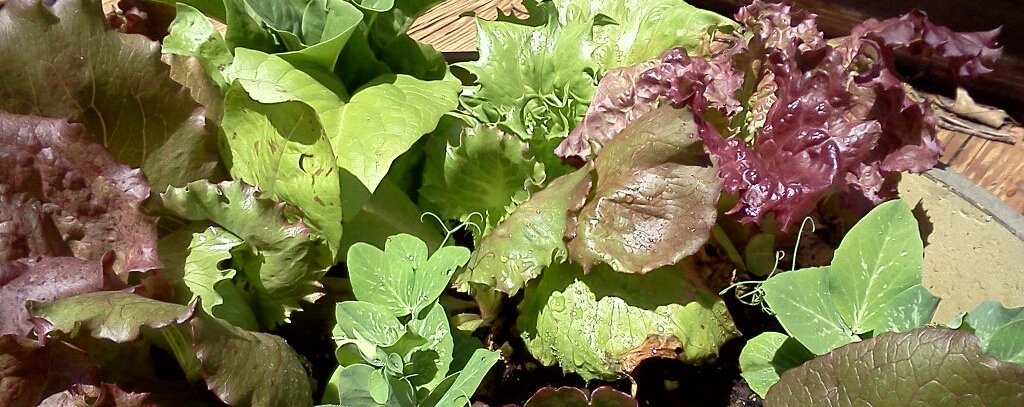
Lettuce March 28th

Onions 2 weeks

Onions March 28th

Potato 2 weeks

First Potato Plant Up March 28th

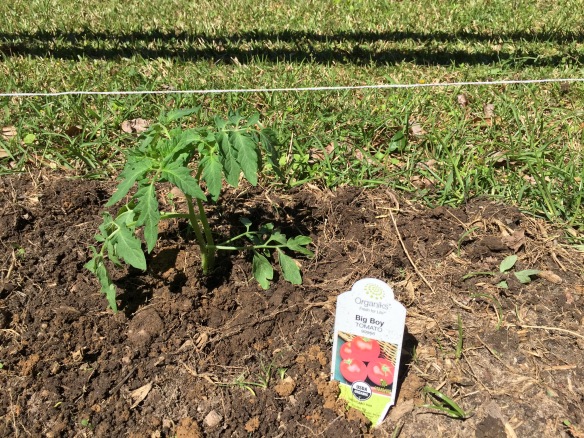
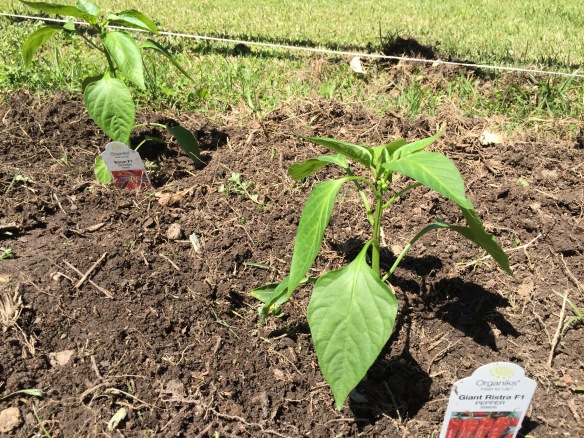
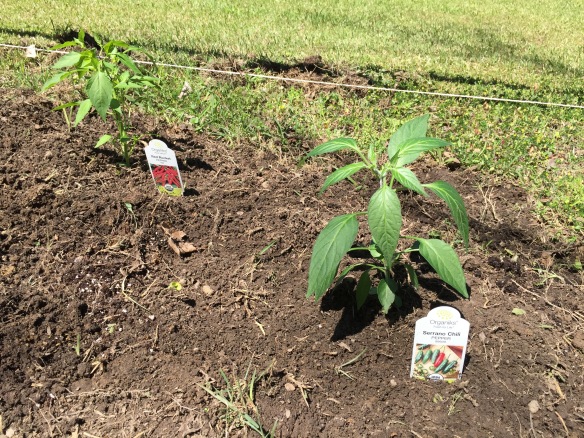
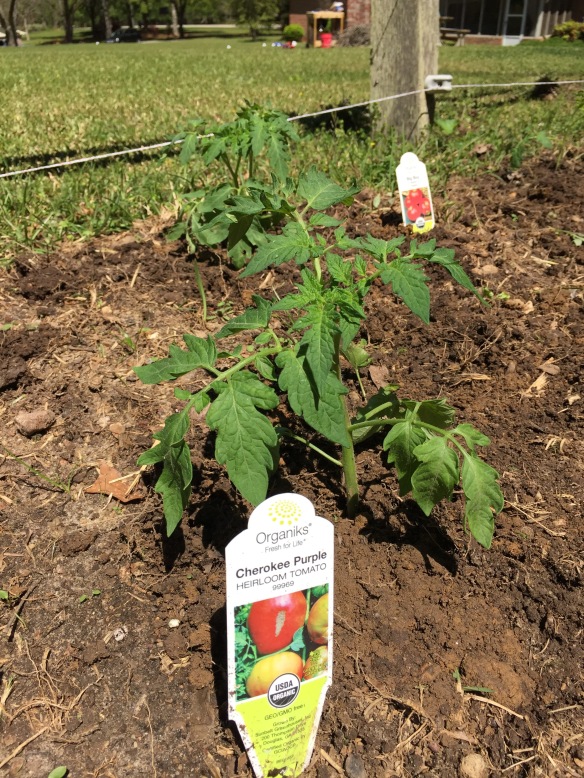
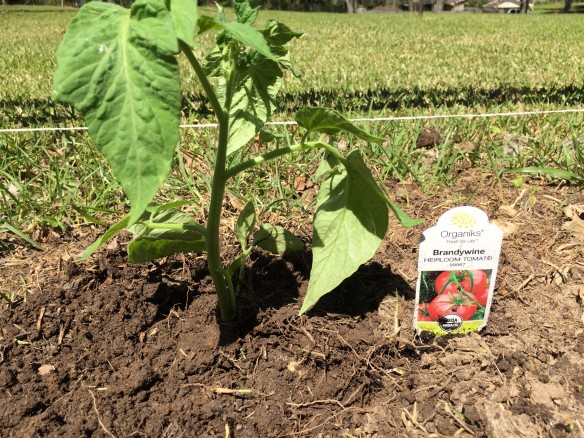
We walked up and down the aisle looking at the small seedlings in 4 packs, the organic plants in 4″ round pots and pre-potted hanging baskets of strawberries. R was fascinated by the plants and the labels, pulling them out and putting them back in, up and down the path. I had a mental list, and knew about where things were going to go in the garden, so we started filling an empty tray with our selections. 2 organic brandywine tomatoes, 2 organic big boy, a 4 pack of smaller super sweet cherry tomatoes and 2 organic purple cherokee heirlooms. Peppers, 1 each, Serrano – my personal favorite, Red Rocket – looks similar to a cayenne, Giant Ristra – described on the label as medium hot and larger than the cayenne, and Baron bell pepper. I have not had much luck with bell peppers in the past, so I didn’t want to invest in more than one plant even though we eat them quite a bit.

Tomatoes3 Tomatoes2 Tomatoes1 Tomato4 Pepper

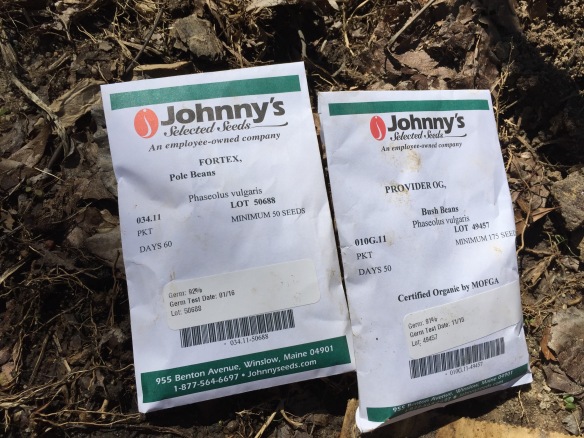
Finally, I planted a row of half Fortex and half Provider beans along the western edge of the garden. I have never planted green beans before, so I got 2 types, one bush and one pole. Should be an interesting experiment year. I plan to plant cucumber next to it, but haven’t found the right type yet (pickling).

Green Bean Seeds

Planted Green Bean seeds

What I planted – Early Spring (March 12)

After many months of dreaming about and planning my garden on paper and in my head, Spring was finally here! The second weekend in March I took a day off from work so that I would have a three day weekend to prep and plant the first wave of veggies in the garden. My first stop was the local farmer’s feed store. As I walked in I passed by the first delivery of seedlings: tomatoes, peppers, squash and cucumbers ready to be planted. I read the labels, admiring the varieties and dreaming of mid summer produce. But in my mind I knew that it was much too early. Our last frost date is April 15th and it wasn’t even March 15th yet! On my list were potatoes, onions, fertilizer for our 8 pecan trees, a couple of t-posts for the green bean trellis and some fertilizer for the garden itself. About a week before I had taken a sample from our garden and had it tested to see what pH it was and what fertilizer it needed. It cost $7 and this is what I got: Soil Report. I told them that it was for a home garden and they provided great recommendations.IMG_2299

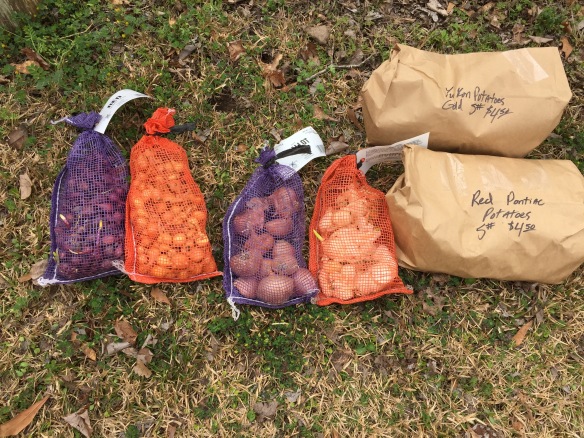
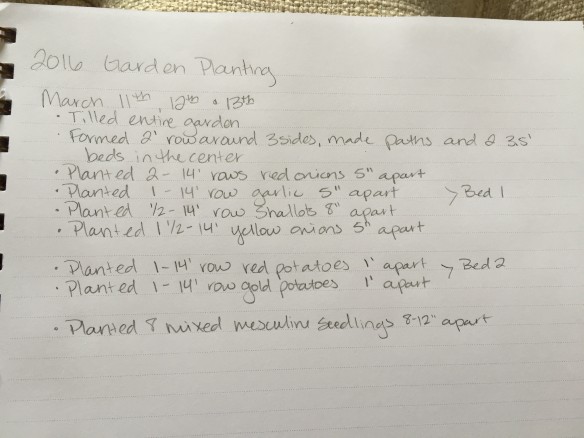
After talking to the employees at the feed store I came home with the above, red onions, yellow onions, shallots, garlic, 5 lbs each yukon gold potatoes and red potatoes. I also took their recommendation to buy a pecan specific fertilizer for our trees, much more cost efficient than trying to get the right proportions myself and easier to spread! Below is what I got done that first 3 day weekend:

image

Here is my beautiful Christmas present from the hubbs that helped in the preparation of the garden soil:

IMG_2298

Charlene, a gardening girls best friend.

Even with the help of this fantastic tiller, it took several hours to prepare the garden before it was ready to plant. I realized after I got home and read up in The Vegetable Gardener’s Bible, 2nd Edition that the potatoes needed to be cut into pieces and dried for a day or two before they could be planted. I got the onions, garlic and shallots in the ground in one of the large beds that afternoon. On Sunday I planted the seed potatoes and the lettuce:

IMG_2290

I knew by my sore muscles and sense of satisfaction that I had accomplished some real work this weekend.

Spring Garden Plans

When we moved into the new house in October, I knew that I could plant some fall produce and it would do well through the winter since we have such a mild climate. Here in Alabama collards, kale, broccoli, peas and lettuce actually do better in a fall planting than an early spring because of the mild winters. With the chaos of selling our old house, moving and setting up a new house (1000 square feet bigger than the old one) I decided that I would spend the winter getting the inside of the house in order and devote the spring to the garden and yard.

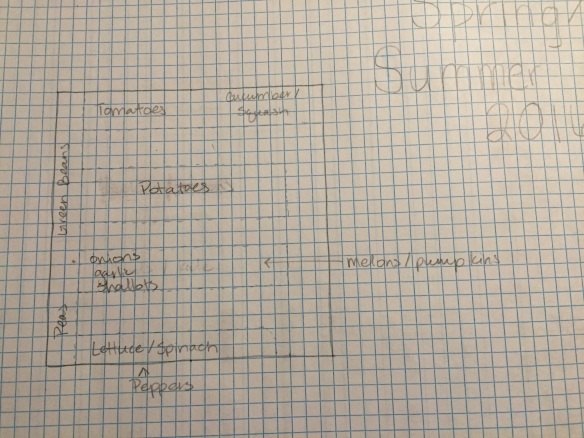
Many lazy Saturday mornings I spent combing through The Vegetable Gardener’s Bible, 2nd Edition, our local ACES website and the endless seed catalogues that start coming in the mail around January, picking out vegetables, reading about the planting methods and sketching out the plan for the garden. By February this is what I had planned out:

image

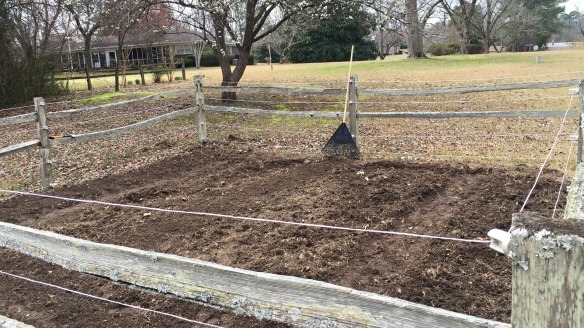
The garden plot that was established by the former owners of our house is 20′ x 20′ with fencing. There was an old solar panel and wiring around the garden, but it was beyond repair. Over the winter we visited the co-op and got a new fence mount solar panel and electric braided wire rope. 4 strings from 3 inches to about 4 feet high should keep most of the pests out (hopefully). Although deer can jump 4 feet with no problem the electric fence and small size of the garden should keep them at bay.

IMG_2293

During our original tour of the house the realtor noted that there was a well, with a tank in the shop. I didn’t really pay much attention to this fact at the time because the water to the house is city water, but now I realized that it was for the garden irrigation. There are four sprinkler heads, one in each corner of the garden, that are fed from the well. During the winter I replaced the heads with new ones (although these are still not working perfectly) and adjusted them to spray as much of the garden as possible. Everything was ready for the Spring! Actual garden planting post to come….

New House 

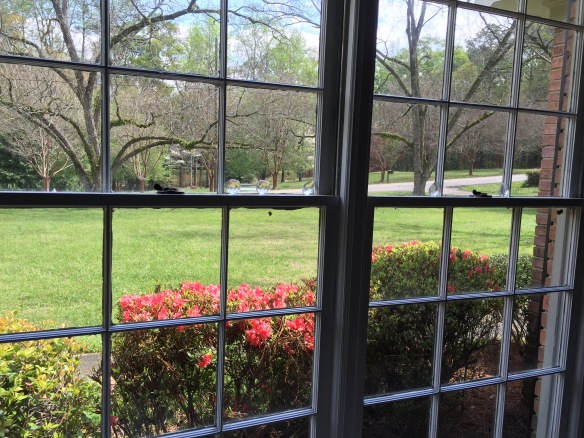
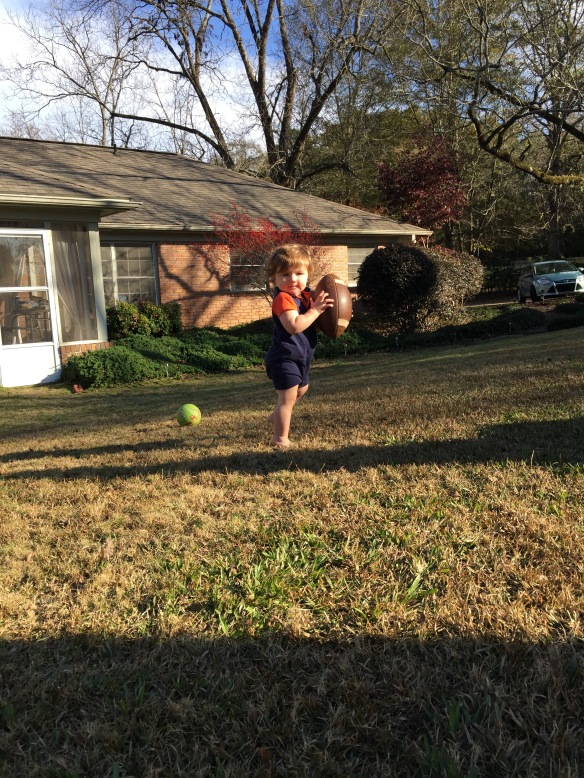
Front WindowA big part of the reason why I am feeling the urge to document my life again is due to the purchase of our dream home. My husband and I lived in the first house we bought together for 8 years. The last year or so of that included our new son. Although it was a 3 bedroom 2 bath, the square footage was pretty small and the space was not a layout we thought would be adequate as R gets older. The yard was nice in the front, but lacked much usable space for throwing a ball or enjoying it the way we imagined that we would want our son to be able to as he grew up. That being said, we were not actively looking for a house and our current house was not on the market.
The only problem with that plan was the fact that I am a total real estate junkie. I Love to browse Zillow, Realtor and FSBO looking at the different types of houses and properties you can get for the same amount of money. About this time (mid summer 2015) two of my friends at work were looking for a new house too. Three young families with sons just a few months apart in age, similar price range looking for houses. So I searched under the lie I told myself, “well if I find something nice I can tell them about it!” Both of the other families sold their houses and bought new ones, yet I was still browsing the market regularly.

IMG_1839

Enjoying the huge new backyard.

About that time, I saw that there were a couple of open houses one weekend and thought it might be fun to just go check them out. The two houses were very similarly priced, right at the top of our price range, but completely different styles. One was less than 10 years old, big newer neighborhood, small lot, lots of kids in the neighborhood. The other was built in 1970, smaller square footage, but over an acre of land in an older neighborhood. We went to the older house first. When we pulled in I liked the shade from the trees and one big branch that hung low enough for us to sit our then 1 year old son on. We walked up to the double doors and went in. It had been renovated somewhat recently, the walls were all painted nice colors and the floors were in good condition. We walked through the foyer, living room, den and into the kitchen. The realtor gave us a very bland run down of the features. About this time we were making eye contact and having a non verbal conversation that only married couples and best friends can understand. We didn’t fully understand why yet, but this was our house, we both knew it before we had seen half of it. About that time the realtor said “and come see the shop outside,” we were sold.   As the tour continued we checked almost every box off of our dream house list. 2 car carport *check, plenty of storage *check, more than one living space *check, fireplace (outdoor) *check, nice kitchen *check, shop *check, big yard *check. The only thing that we compromised on was the bedrooms. All four on the same side of the house and the master bathroom is pretty small. As it turns out, the tub is an old cast iron extra deep tub which I am absolutely in love with now. We called our realtor the next day and put in an offer. After a little bit of back and forth, we had come to a price both buyer and seller were happy with. Just a couple months later, after a small flood and some new floors, we moved in! The grand plan is to live here pretty much forever, or at least until R is grown. For now we are discovering all of the amazing plants that already exist in our yard and planning to add some more of our own! Post on the grand plan to come soon!

IMG_1563

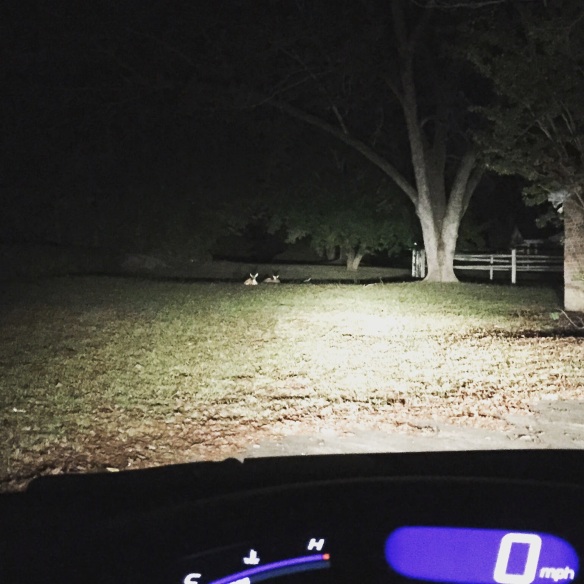
Pet Deer in the backyard when I drove up shortly after buying the house.